


Skyplanner data structure #
Before we dive into the timelogs, we need to discuss a little about the data structure in Skyplanner and how things work under the hood. All of this will come into play later.
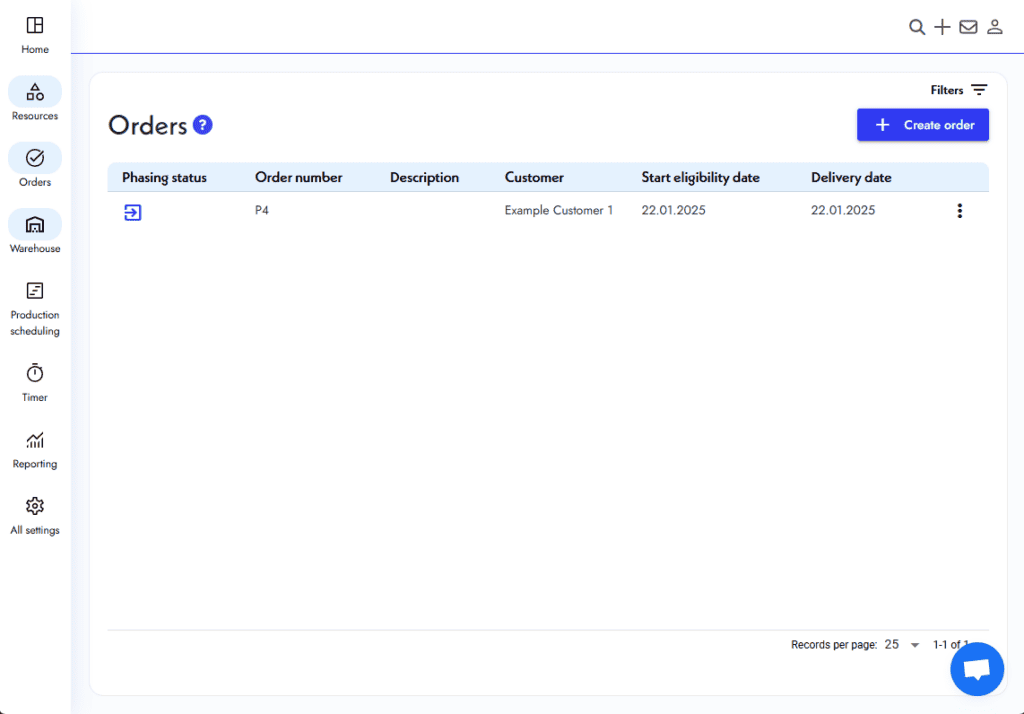
If you integrated your order/workorder/job data into Skyplanner, you most likely used at least these API-endpoints:
- phaser-orders
- phaser-order-rows
- phaser-jobs
Effectively, data inserted into these endpoints is represented in the Skyplanner UI like this:

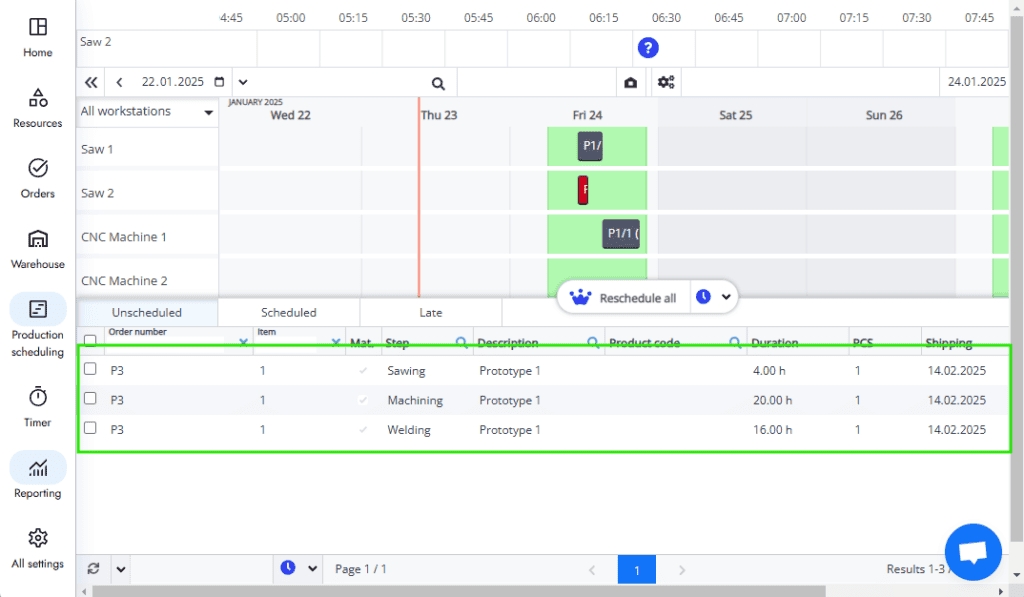
After inserting your orders into Skyplanner you’ll want to export them (this can be done via the UI or the /phaser-orders/export-endpoint) into the Production Scheduling module:
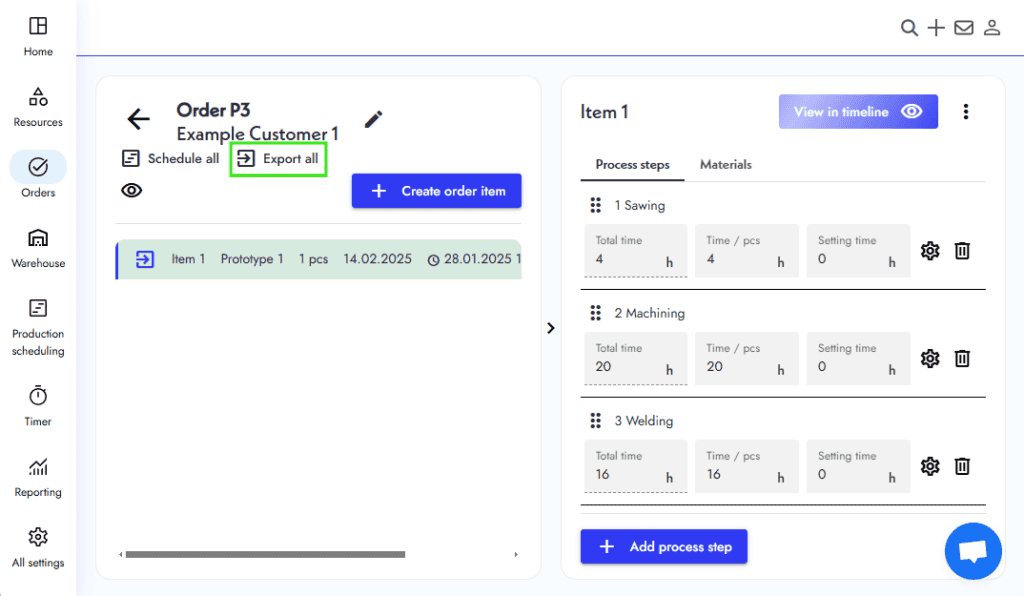
When exporting orders Skyplanner effectively copies the order data from one database table to another. So if you change something for example through the /phaser-orders -endpoint, you need to export the data again to update it in Production Scheduling. This also means that in order to access the orders you see in the Production Scheduling window you have to use different API-endpoints!
The ”changed” endpoints go like this:
- /phaser-orders → /orders
- /phaser-order-rows → /order-rows
- /phaser-jobs → /jobs
This is important to know, because when using the /timelogs -endpoint to log your production events etc you have to use the related entities found in Production Scheduling -endpoints!
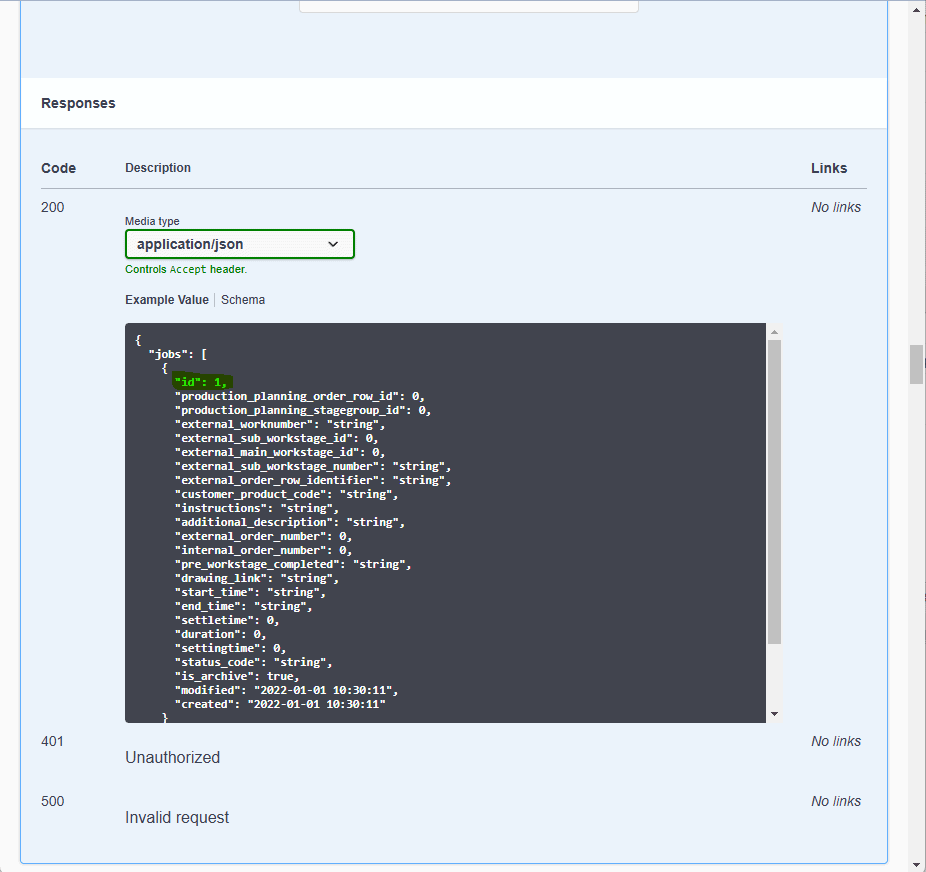
For example, you need the production_planning_job_id (to reiterate: production_planning_jobs are the entities accessed from the /jobs -endpoint) to POST a new timelog:
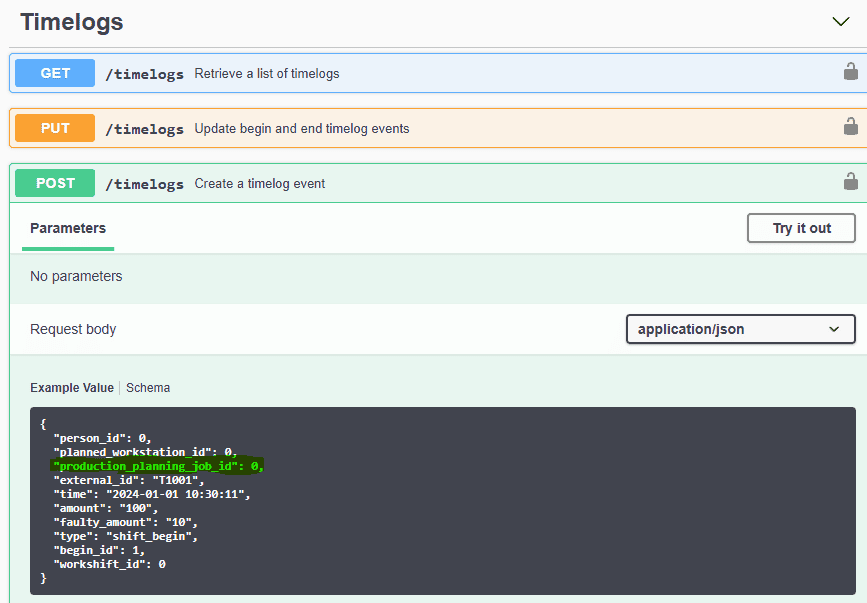
You can find the production_planning_job_id you need from either the /phaser-jobs -endpoint:

Or from the /job -endpoint:
Creating timelogs using the REST-API #
Making timelogs to Skyplanner through the API uses the same rules and systems that are in the UI. So it might be beneficial to familiarize yourself how the system works in the UI before attempting to use it through the API.
Timelog basics #
Skyplanner has four timelog event types:
- shift_begin
- paused
- continued
- shift_end
Shift_begin-event is sent when the job is started for the first time. Never send more than one shift_begin event for each job!
Paused-event pauses the job.
Continued-event resumes a paused job.
Shift_end completes the job. Never send more than one shift_end event for each job!
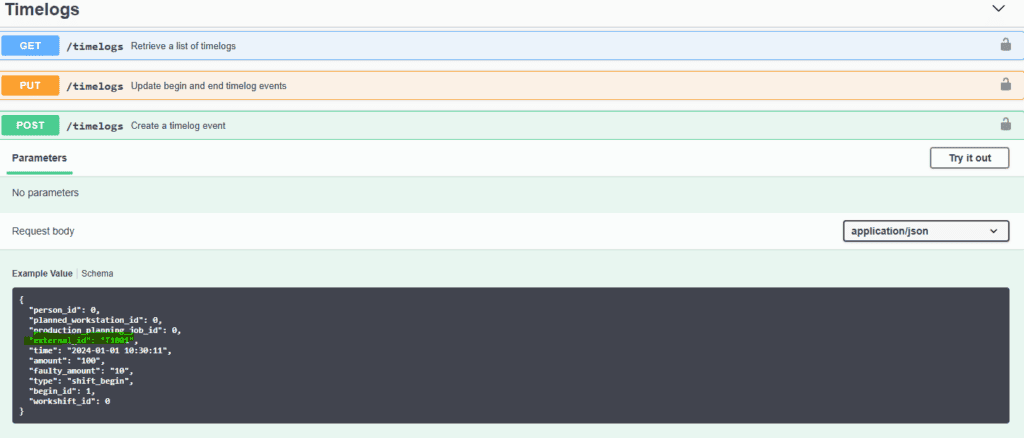
Required data for timelogs:
- person_id
- Can be found from the /people-endpoint
- Not the same as user_id!
- planned_workstation_id
- The workstation the job is being done
- Can be found from the /workstations-endpoint
- date_time
- The point of time the event is done
- Format: 2024-01-01 10:30:11
In order to specify what Skyplanner timelog is tied to the timelog from whatever external system you are using, you can use the external_id field. You can then for example make GET requests using this id in order to find a specifict timelog from Skyplanner.
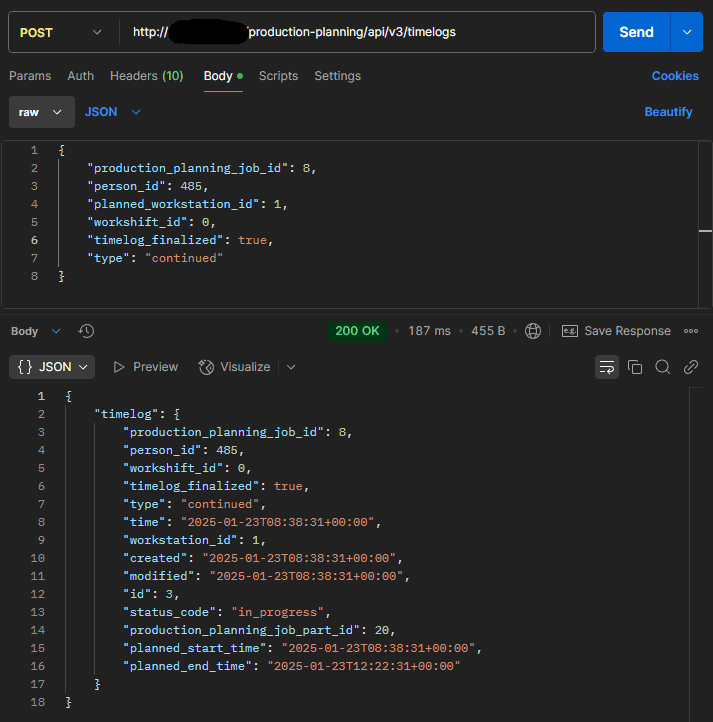
Starting a job #
You can start jobs by sending POST-request like this to the API:
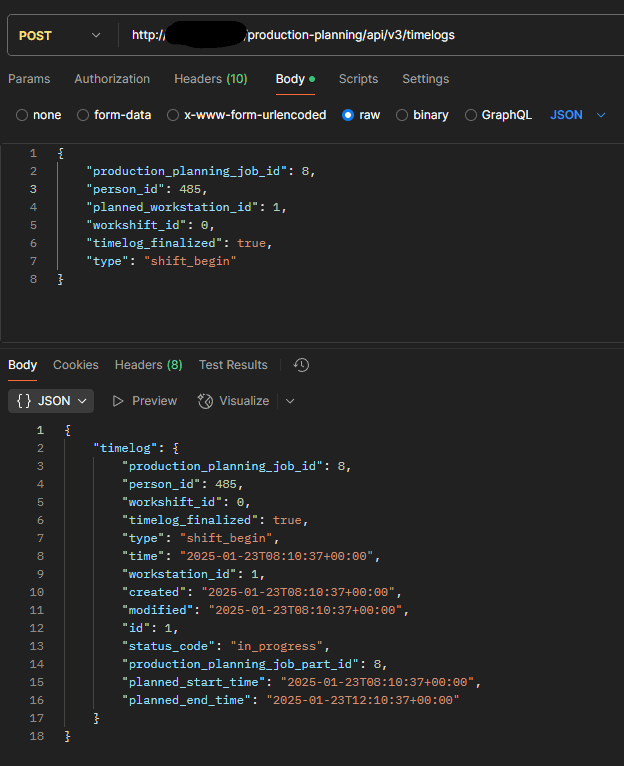
When setting the POST data for the timelogs set workshift_id as 0 and timelog_finalized as true
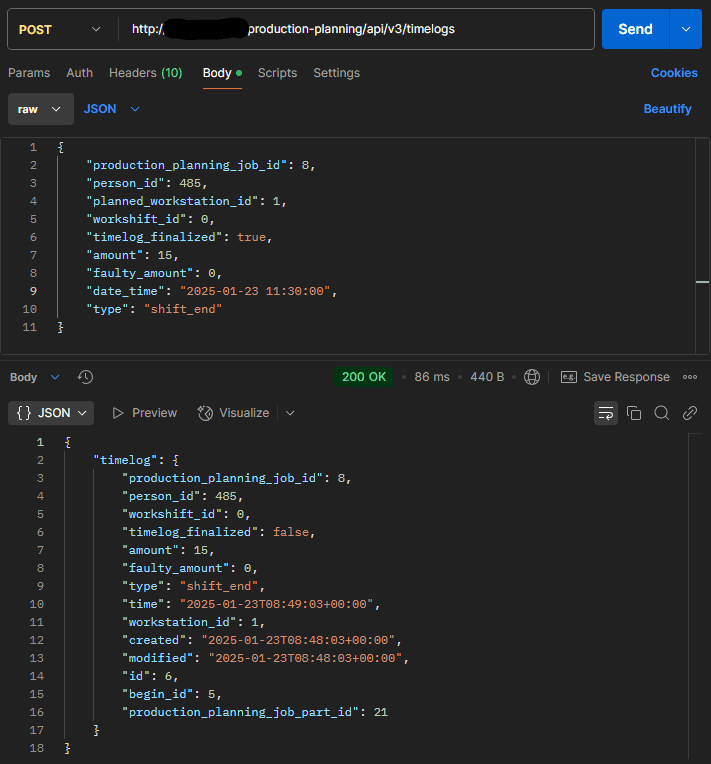
Pausing a job #
Pause jobs by sending a POST request like this:
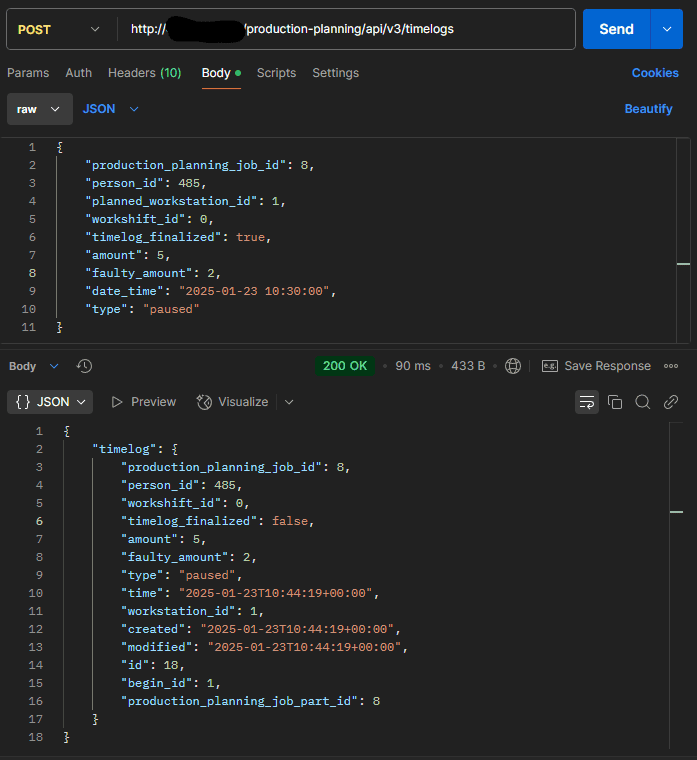
In paused-type timelogs you can set the amount and faulty_amount. Note also the timelog type and date_time.
Continuing a job #
Here is how you continue a paused timelog:
Note that if you try to continue a job that has been ended by a shift_end event, you will get an error.
Ending a job #
Here is how you end a job by a shift_end timelog:
In shift_end-events you can give the amount and faulty_amount values just like in paused-events. Note that if you try to do a shift_end-event to a job that is not running, you will get an error.
Updating timelogs #
You can update timelog data by sending PUT-requests to the /timelogs-endpoint, like this:
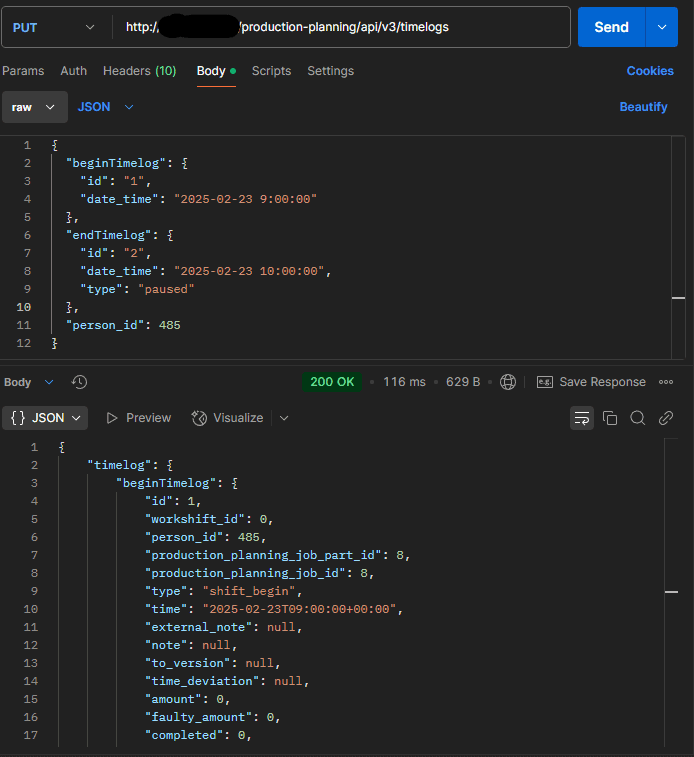
Note that you must have both beginTimelog and endTimelog data set in order to do an update. Timelogs in Skyplanner are stored like this: each ”full” (timelog that has both a start and end (eg. shift_begin/continued & paused/shift_end) timelog has a separate entity for the begin and end.
These are paired by the begin_id value found in the endlog. In the above example the beginTimelog has the id value of 1 and thus its endTimelog has the begin_id value 1.
You must also give the person_id and endTimelog values for each time you do an update request even if you aren’t changing them.
Alternative ways to do timelogs #
Here are some alternative ways you can log to your jobs using the API.
Logfull #
If you want to send both the begin and end timelogs in a single request you can use the /timelogs/log-full -endpoint, like this:
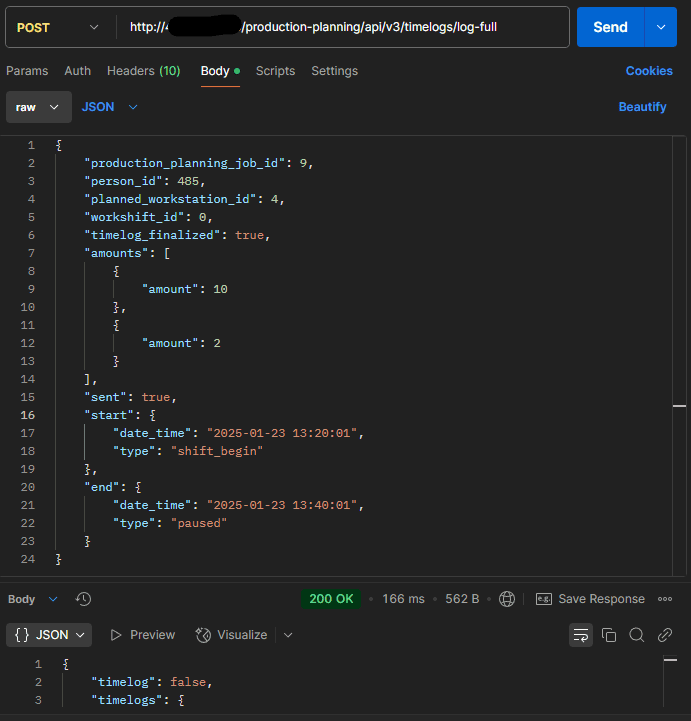
Note how the amounts are sent here: the first ”amount” value denotes the faulty amount and the second one the amount. This request creates the beginlog and endlog entities in one single request.
Quicklog #
”Quicklogging” to a job completes it in a single request, sets the completed amount of products to match the value set in the order item. Quicklogging is done by using the /timelogs/quick-log -endpoint:
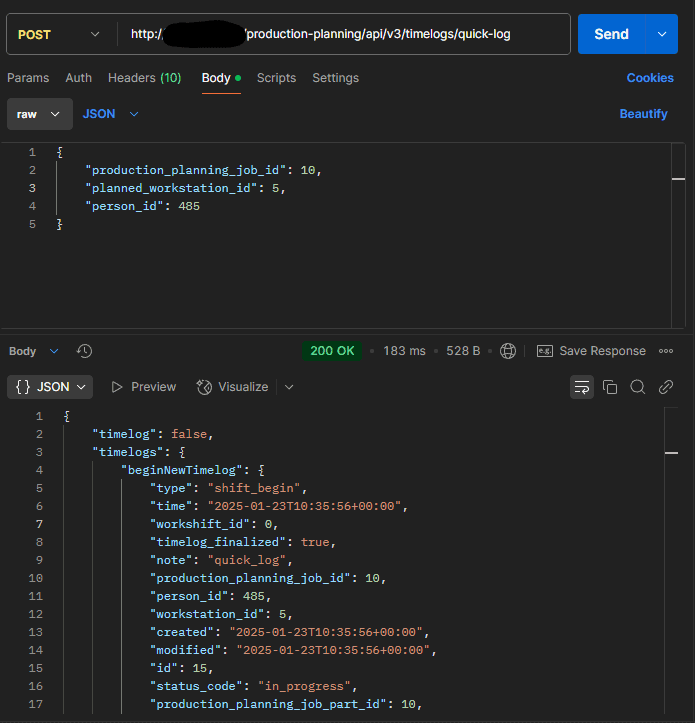
Note that here you need only give the production_planning_job_id, planned_workstation_id and person_id. The time and amount values are automatically filled. Also note that quicklogged jobs are always completed with the shift_end-event, so no further logging is possible after quicklog!